In this second instalment of the Organizational Tools Blog Series, I will explore how I’ve used Trello to organize my major projects. While I have kept an agenda in the past, I would not plan my to-do’s or daily tasks in relation to the larger picture (other than how I saw it in my head). This was not terribly effective. While I still managed to get things done, it wasn’t in any sort of coherent fashion. My colleague, Karen, mentioned that she used a board to move things from To-Do, to In Progress, and then to Done. So, I thought I would give it a shot. With a little research, I found out that this format is called a Kanban Board.

My various boards within Trello
Getting Started
I started with creating a board for my major projects. Then within those boards I made a list for To-Do, In Progress, Under Review, and Done. The under review section is for things that have been sent out to my supervisor or another team member. Then I made a card for each task. Within a card you are able to make a checklist. this allowed me to focus tasks on sections of projects then have the checklist to check off items such as literature search, reading, note taking, etc.
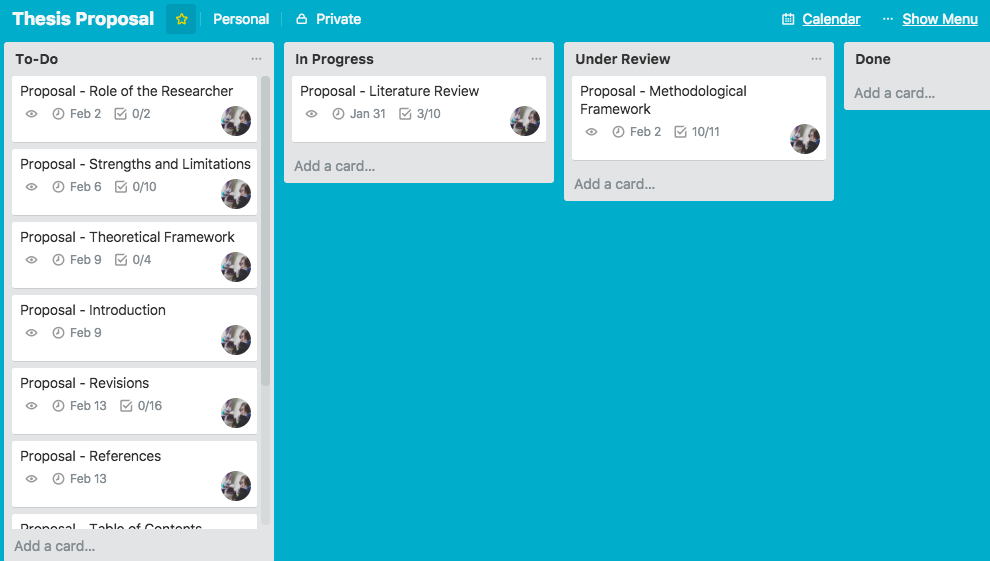
Lists with cards within each of them (except done…)
Initially, I didn’t set deadlines. But this week, I have been setting more realistic deadlines and start dates. You can also colour code/tag each card. However I am still working on whether this is useful to me, or how I would like to do it. I would suggest that working solely in Trello, you might want to colour code based on priorities.
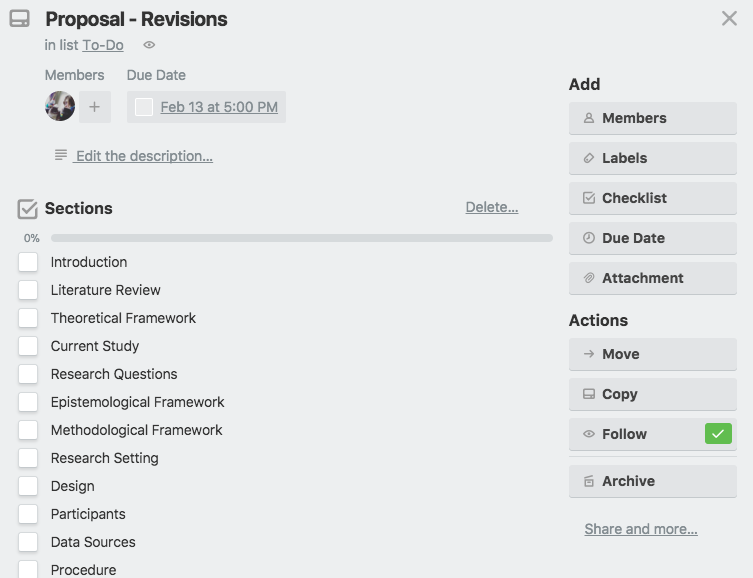
Checklist and details within a Trello Card
This could also be a great tool for collaborating, although I haven’t used it in this capacity as of yet. But once I get my high priority items into the Done list, I will be start focusing on my looming collaborative projects.
Gantt Charts
This week, I have been exploring Gantt charts. Which allows you to see an overall view of your timelines based on a set start time and deadline. Trello allows you to use various plug-ins to accomplish a Gantt chart (Note: you can only use one plug-in or “power-up” per board in the free version. I’ve opted to use this to sync to my calendar). One option is through Placker. I’ve found this tool to be very useful, but it is only free for 15 days, there may be other free options. But so far, Placker is working well (I may subscribe to it and have to write a post on how I’m using it).
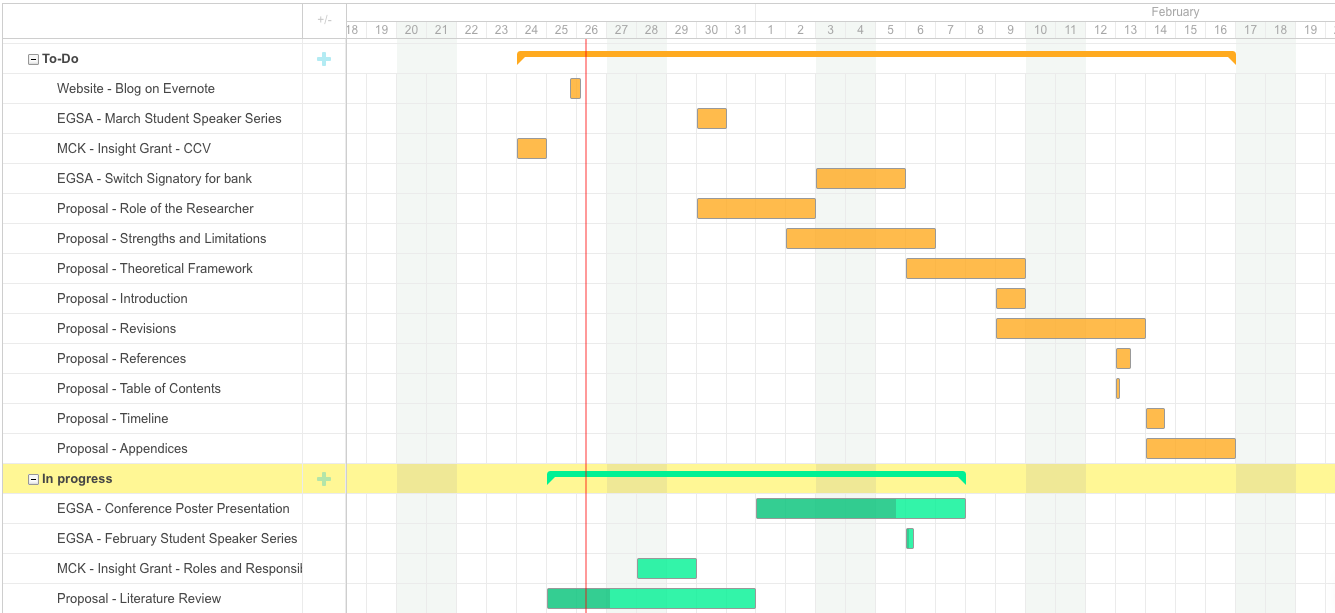
A limited example (only 2 projects) of my Gantt chart
To create your Gantt chart, you create a start date, and end date (some programs will allow you to set the due date separately). It will then generate a calendar view for you to see your tasks and workload.
Calendar Integration
I found this to be somewhat tedious, you need to add each board to your calendar individually. However, then you can see all your due dates within your chosen calendar format (I use google calendar).
First, turn on the calendar power-up, then you will get a URL which you can copy and paste into your calendar program of choice to sync it up! If you delete a board from Trello, you will need to manually delete the board URL from your calendar.
Each night I review my boards to plan out my next day in my Productivity Journal.
Up Next
Next week, I will be posting about how I am using Evernote to organize my literature.


2 Comments
Leva Rouhani · June 4, 2019 at 5:07 pm
This is a great post! I have used it to set up my own Trello board. Would love to read an update, if you are still using it, new features?, have you used it differently (etc).
Heather W. · June 11, 2019 at 3:26 pm
Thank you, Leva! Glad you found it useful! I have an update in my drafts! I just need to do some screenshots and formatting then a new post will be coming. Not much has changed for how I use Trello/Placker. My use of my productivity journal/planner has changed the most.